

Discover the Kitchen Tool Everyone Is Raving About!
- • Precision Engineered: Sharp blade with durable craftsmanship.
- • Comfort First: Ergonomic design for effortless slicing.
- • Stylish & Strong: Elegant wood handle meets stainless steel strength.
- • Risk-Free Pick: Thousands of happy home chefs can’t be wrong.
- • Today’s Deal: Just $29.95 instead of $99.85 — limited-time offer!
This post may include affiliate links — learn more here .
Introduction
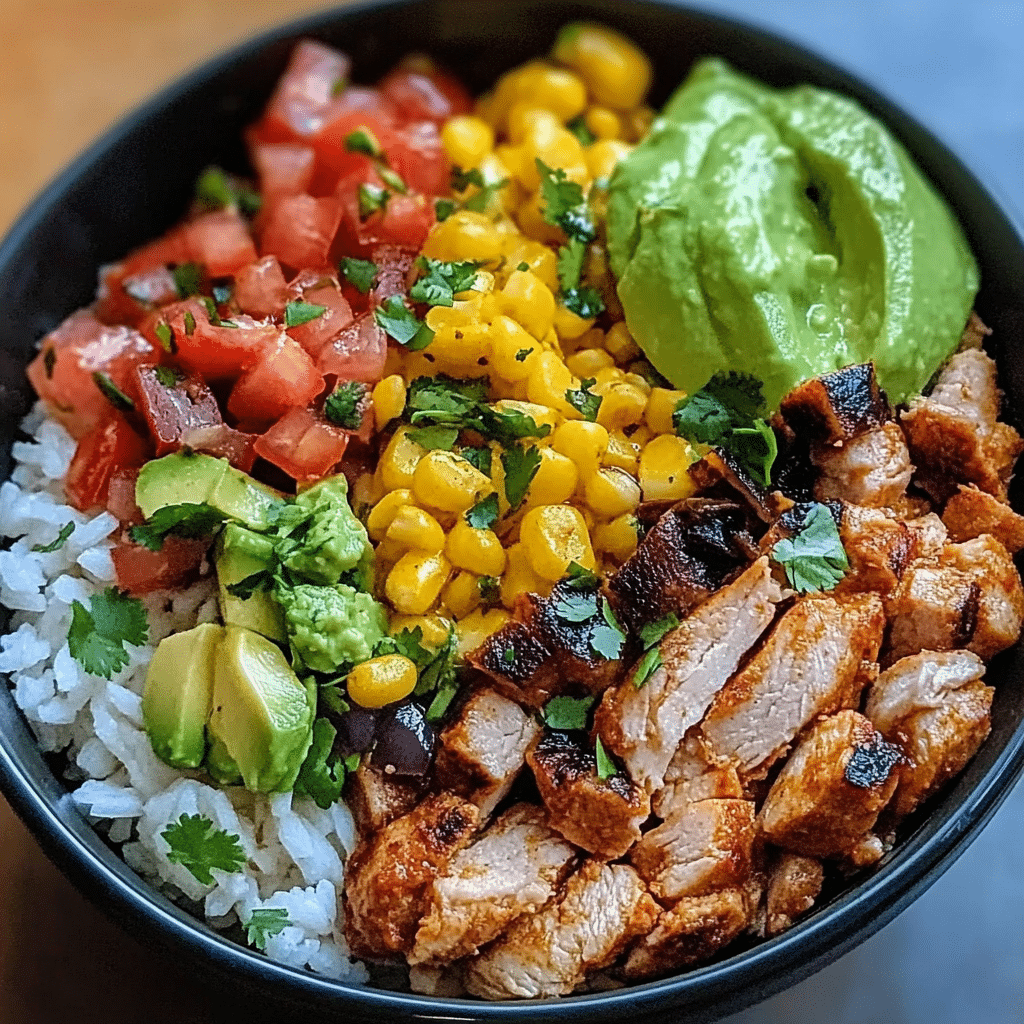
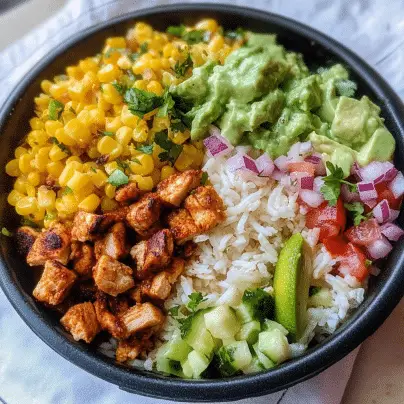
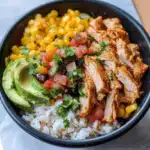
If you’re craving a meal that’s both satisfying and bursting with flavor, look no further than a Chicken Burrito Bowl. This delicious dish is a modern take on the traditional burrito, offering all the bold, savory ingredients without the need for a tortilla wrap. Whether you’re looking for a quick lunch or a hearty dinner, Chicken Burrito Bowls are an excellent choice. They’re packed with protein, vegetables, and vibrant spices, all coming together to create a dish that’s not only delicious but also customizable to suit your dietary preferences.
In this article, we’ll dive into why Chicken Burrito Bowls are such a great meal choice, provide a step-by-step guide on how to make them, and explore various ways to tailor the dish to your liking. Whether you’re new to preparing burrito bowls or a seasoned pro, you’ll find this recipe simple, straightforward, and satisfying. Best of all, this version is halal-friendly, meaning it’s made without pork, bacon, or wine, so it’s suitable for a wide range of dietary needs.
Why You’ll Love This Recipe
- Flavor Explosion: Chicken Burrito Bowls are packed with zesty flavors from the marinade, the freshness of the vegetables, and the richness of the toppings. Each bite delivers a satisfying combination of savory, spicy, and tangy notes.
- Healthy and Nutritious: With lean protein from chicken, fiber-rich beans, fresh veggies, and nutrient-packed toppings like avocado, this dish is well-balanced and nourishing.
- Customizable: The beauty of a burrito bowl is that you can make it your own. Choose your favorite ingredients and adjust the spice level to your liking. It’s a meal that can easily be adapted for vegan, gluten-free, or low-carb diets.
- Quick and Easy: The preparation time for Chicken Burrito Bowls is relatively short, making them perfect for busy weeknights or meal prepping for the week ahead.
- Halal-Friendly: This recipe is made with halal-certified chicken, meaning it meets the dietary restrictions of those who avoid pork and alcohol.
Preparation Time and Servings
- Total Time: 45 minutes (20 minutes for prep, 25 minutes for cooking)
- Servings: This recipe makes 4 servings, making it perfect for a family meal or for meal prepping.
- Nutrition Facts (per serving):
- Calories: 550
- Protein: 40g
- Carbs: 45g
- Fat: 25g
Ingredients
Chicken:
- 2 large boneless, skinless chicken breasts (about 1 lb): Chicken breast is a lean protein that’s both filling and versatile for burrito bowls.
- 2 tablespoons olive oil: For marinating the chicken and grilling it.
- 1 teaspoon ground cumin: Adds a warm, earthy flavor to the marinade.
- 1 teaspoon smoked paprika: For a slightly smoky flavor.
- 1 teaspoon chili powder: Adds some heat and depth.
- 1 teaspoon garlic powder: For a savory base note.
- ½ teaspoon ground black pepper: For seasoning.
- ½ teaspoon salt: To enhance the flavors.
- 1 lime: For fresh lime juice to add a tangy zing to the marinade.
Rice Base:
- 1 cup long-grain white rice: The foundation of the burrito bowl, offering a satisfying and neutral base.
- 2 cups water or chicken broth: The liquid to cook the rice, adding flavor and moisture.
- 1 tablespoon olive oil: To give the rice a bit of richness.
- ½ teaspoon ground turmeric (optional): For a touch of color and subtle flavor, you can use turmeric to add warmth to the rice.
Bean Mixture:
- 1 can (15 oz) black beans, drained and rinsed: Black beans are a hearty and nutritious addition, rich in fiber and protein.
- 1 can (15 oz) corn kernels, drained: Sweet corn adds a pop of color and sweetness to balance the spices.
- 1 tablespoon olive oil: To sauté the beans and corn.
- 1 teaspoon ground cumin: Adds earthy depth to the beans.
- ½ teaspoon chili powder: For a bit of heat.
- Salt and pepper to taste.
Toppings:
- 1 avocado: Sliced, to add creaminess and a fresh flavor to the bowl.
- ½ cup diced red onion: Adds a sharp bite and color contrast to the bowl.
- 1 medium tomato: Diced, for a refreshing touch of juiciness.
- ¼ cup fresh cilantro: Chopped, for a burst of herbal freshness.
- 1 cup shredded lettuce: For some crunch and a refreshing bite.
- ½ cup shredded cheddar cheese (optional): Adds a creamy, melty element to the bowl.
- 1 lime: For extra wedges to squeeze over the bowl before serving.
Optional Sauce:
- ½ cup sour cream or Greek yogurt: For creaminess and tanginess.
- 1 tablespoon hot sauce or sriracha: For some added heat.
- 1 tablespoon lime juice: To enhance the freshness of the sauce.
Step-by-Step
 Preparation
FIRST STEP: MARINATE THE CHICKEN
- Prepare the Marinade: In a small bowl, combine olive oil, cumin, smoked paprika, chili powder, garlic powder, black pepper, salt, and lime juice. Stir until the spices are well blended.
- Marinate the Chicken: Place the chicken breasts in a shallow dish or resealable plastic bag. Pour the marinade over the chicken, making sure it is evenly coated. Cover and refrigerate for at least 20 minutes, or up to 2 hours, to allow the chicken to absorb the flavors.
SECOND STEP: COOK THE RICE
- Cook the Rice: In a medium saucepan, add the rice, water or chicken broth, olive oil, and turmeric (if using). Bring to a boil over high heat. Once it boils, reduce the heat to low, cover the pan, and simmer for 15-18 minutes, or until the rice is fully cooked and the liquid is absorbed. Remove from heat and let it sit for 5 minutes. Fluff the rice with a fork before serving.
THIRD STEP: COOK THE CHICKEN
- Grill the Chicken: Heat a grill pan or outdoor grill over medium-high heat. Once hot, place the marinated chicken breasts on the grill. Cook for 5-7 minutes per side, or until the internal temperature reaches 165°F (74°C), ensuring the chicken is fully cooked. Remove from the grill and let it rest for 5 minutes.
- Slice the Chicken: Once rested, slice the chicken breasts into thin strips, ready for serving in the burrito bowl.
FOURTH STEP: PREPARE THE BEANS AND CORN
- Sauté the Beans and Corn: Heat olive oil in a large skillet over medium heat. Add the black beans and corn, and sauté for about 5 minutes, stirring occasionally. Add cumin, chili powder, salt, and pepper to taste. Cook for another 2-3 minutes, then remove from heat.
FIFTH STEP: ASSEMBLE THE BOWLS
- Build the Base: In individual bowls, add a scoop of cooked rice as the base.
- Add the Chicken: Layer the sliced chicken on top of the rice.
- Add the Bean and Corn Mixture: Spoon the sautéed beans and corn over the chicken.
- Add the Toppings: Top the bowl with fresh avocado slices, diced red onion, chopped tomatoes, cilantro, shredded lettuce, and cheese (if using).
- Optional Sauce: If desired, drizzle the sour cream or Greek yogurt mixture with lime juice and hot sauce over the top for added creaminess and heat.
FINAL STEP: SERVE AND ENJOY
- Serve: Garnish the Chicken Burrito Bowls with lime wedges for extra zest. Serve immediately for a fresh, satisfying meal. Enjoy the layers of flavor and texture in every bite!
How to Serve Chicken Burrito Bowls
Chicken Burrito Bowls are perfect for a variety of occasions and can be served in many different ways. Here are a few ideas for how to enjoy this delicious meal:
1. As a Family Meal
Chicken Burrito Bowls are a great option for family dinners or gatherings. You can set up a burrito bowl bar, allowing everyone to assemble their bowls with their favorite ingredients and toppings. This makes the meal interactive and fun for all ages.
2. Meal Prepping
These bowls are perfect for meal prepping. You can prepare all the components (chicken, rice, beans, and toppings) in advance, then store them in separate containers in the fridge. When you’re ready to eat, simply reheat the rice and chicken, and assemble the bowls with fresh toppings. This is a great way to save time during the week.
3. Pairing with Drinks
Pair your Chicken Burrito Bowl with a refreshing beverage like iced tea, lime-infused water, or a light soda. For a more indulgent option, a cold cerveza (beer) or margarita would complement the bold flavors.
4. As a Light Meal
If you’re looking for a lighter option, you can skip the cheese and reduce the portion of rice. Add extra veggies like roasted bell peppers, sautéed spinach, or cauliflower rice for a lower-carb alternative.
Additional Tips
- Make Ahead: You can marinate the chicken up to 24 hours in advance for even deeper flavor. Additionally, rice and beans can be prepped ahead of time, so all you need to do is cook the chicken and assemble the bowls.
- Customize the Protein: If you prefer, you can substitute the chicken with grilled shrimp, beef, or even tofu for a vegetarian option. The marinade works well with any protein you choose.
- Add Extra Veggies: Try adding roasted vegetables such as sweet potatoes, bell peppers, or zucchini for a more nutrient-dense meal.
Recipe Variations
While this Chicken Burrito Bowl recipe is delicious as written, you can customize it to suit your tastes:
1. Vegetarian Version
To make the burrito bowl vegetarian, replace the chicken with roasted vegetables or a plant-based protein like tempeh or tofu. Add extra beans, corn, and guacamole for a hearty and satisfying meal.
2. Low-Carb Option
For a low-carb variation, use cauliflower rice instead of regular rice. This swaps out the carbs for a low-calorie, fiber-rich alternative that’s perfect for those watching their carb intake.
3. Spicy Twist
If you love heat, consider adding jalapeños, spicy salsa, or a drizzle of hot sauce to your bowl. You can also mix some chipotle chili powder into the marinade for a smoky, spicy kick.
Freezing and Storage
If you have leftovers, you can store the components of the burrito bowls separately in airtight containers in the fridge for up to 3 days. When you’re ready to eat, simply reheat the chicken, rice, and beans, and assemble the bowls with fresh toppings.
To freeze, wrap the chicken and rice tightly in foil or plastic wrap, and store them in freezer-safe bags. When ready to eat, thaw overnight in the fridge and reheat.
Special Equipment
While making Cheesy Garlic Chicken Wraps doesn’t require many specialized tools, a few essential kitchen items will help make the preparation process smoother and more efficient:
1. Large Skillet or Grill Pan
- A large skillet or a grill pan is essential for cooking the chicken evenly and achieving a golden, crispy texture. If you have a non-stick pan, it can make the cooking process even easier by preventing the chicken from sticking.
2. Meat Thermometer
- Using a meat thermometer is a great way to ensure that the chicken is cooked through without overcooking it. The chicken should reach an internal temperature of 165°F (75°C) to be safe to eat.
3. Sharp Knife
- A sharp knife is essential for cutting the chicken breasts into strips or chunks. This ensures that the chicken cooks evenly and is easy to handle when assembling the wraps.
4. Mixing Bowls
- Mixing bowls are used for tossing the chicken in the marinade, preparing the garlic sauce, and combining any toppings before assembling the wraps.
5. Tongs
- Tongs will help you flip the chicken easily in the skillet or on the grill, preventing it from falling apart while ensuring an even sear.
6. Baking Sheet (optional)
- If you’re baking the wraps in the oven to melt the cheese or to keep them warm, a baking sheet is ideal. Lining it with parchment paper can also prevent sticking and make cleanup easier.
7. Grater (optional)
- If you’re using a block of cheese, a grater will be helpful to shred the cheese yourself. Freshly grated cheese melts better and offers superior flavor compared to pre-shredded cheese.
Frequently Asked Questions (FAQ)
1. Can I use a different protein instead of chicken?
- Absolutely! If you prefer a different protein, you can easily substitute the chicken with beef, lamb, turkey, or even tofu for a vegetarian option. Ensure that the cooking times are adjusted according to the protein you’re using to make sure it cooks through.
2. Can I make these wraps ahead of time?
- Yes, you can prepare the components of the wraps in advance. Cook the chicken, prepare the garlic sauce, and chop your veggies. Store everything separately in airtight containers in the fridge for up to 2 days. When you’re ready to eat, simply assemble the wraps and heat them in the skillet or oven to melt the cheese.
3. Are these wraps gluten-free?
- To make these wraps gluten-free, simply use gluten-free wraps or tortillas. Make sure that all your other ingredients, like sauces and seasonings, are gluten-free as well.
4. Can I make the wraps spicy?
- Yes! If you enjoy a bit of heat, you can add chili powder, cayenne pepper, or crushed red pepper flakes to the chicken marinade or to the garlic sauce. You can also use spicy salsas or hot sauces as a topping.
5. What kind of cheese works best for these wraps?
- Cheddar cheese is a popular choice for its sharp, creamy flavor, but you can use any cheese you prefer. Mozzarella works well if you want a stretchier, milder cheese, while pepper jack can add some extra heat. Feel free to mix and match according to your taste.
Chicken Burrito Bowl Recipe
- Total Time: 45minutes
Ingredients
For the Chicken:
- 2 large boneless, skinless chicken breasts (about 1 lb): Chicken breast is a lean protein that’s both filling and versatile for burrito bowls.
- 2 tablespoons olive oil: For marinating the chicken and grilling it.
- 1 teaspoon ground cumin: Adds a warm, earthy flavor to the marinade.
- 1 teaspoon smoked paprika: For a slightly smoky flavor.
- 1 teaspoon chili powder: Adds some heat and depth.
- 1 teaspoon garlic powder: For a savory base note.
- ½ teaspoon ground black pepper: For seasoning.
- ½ teaspoon salt: To enhance the flavors.
- 1 lime: For fresh lime juice to add a tangy zing to the marinade.
For the Rice Base:
- 1 cup long-grain white rice: The foundation of the burrito bowl, offering a satisfying and neutral base.
- 2 cups water or chicken broth: The liquid to cook the rice, adding flavor and moisture.
- 1 tablespoon olive oil: To give the rice a bit of richness.
- ½ teaspoon ground turmeric (optional): For a touch of color and subtle flavor, you can use turmeric to add warmth to the rice.
For the Bean Mixture:
- 1 can (15 oz) black beans, drained and rinsed: Black beans are a hearty and nutritious addition, rich in fiber and protein.
- 1 can (15 oz) corn kernels, drained: Sweet corn adds a pop of color and sweetness to balance the spices.
- 1 tablespoon olive oil: To sauté the beans and corn.
- 1 teaspoon ground cumin: Adds earthy depth to the beans.
- ½ teaspoon chili powder: For a bit of heat.
- Salt and pepper to taste.
Toppings:
- 1 avocado: Sliced, to add creaminess and a fresh flavor to the bowl.
- ½ cup diced red onion: Adds a sharp bite and color contrast to the bowl.
- 1 medium tomato: Diced, for a refreshing touch of juiciness.
- ¼ cup fresh cilantro: Chopped, for a burst of herbal freshness.
- 1 cup shredded lettuce: For some crunch and a refreshing bite.
- ½ cup shredded cheddar cheese (optional): Adds a creamy, melty element to the bowl.
- 1 lime: For extra wedges to squeeze over the bowl before serving.
For the Optional Sauce:
- ½ cup sour cream or Greek yogurt: For creaminess and tanginess.
- 1 tablespoon hot sauce or sriracha: For some added heat.
- 1 tablespoon lime juice: To enhance the freshness of the sauce.
Instructions
FIRST STEP: MARINATE THE CHICKEN
- Prepare the Marinade: In a small bowl, combine olive oil, cumin, smoked paprika, chili powder, garlic powder, black pepper, salt, and lime juice. Stir until the spices are well blended.
- Marinate the Chicken: Place the chicken breasts in a shallow dish or resealable plastic bag. Pour the marinade over the chicken, making sure it is evenly coated. Cover and refrigerate for at least 20 minutes, or up to 2 hours, to allow the chicken to absorb the flavors.
SECOND STEP: COOK THE RICE
- Cook the Rice: In a medium saucepan, add the rice, water or chicken broth, olive oil, and turmeric (if using). Bring to a boil over high heat. Once it boils, reduce the heat to low, cover the pan, and simmer for 15-18 minutes, or until the rice is fully cooked and the liquid is absorbed. Remove from heat and let it sit for 5 minutes. Fluff the rice with a fork before serving.
THIRD STEP: COOK THE CHICKEN
- Grill the Chicken: Heat a grill pan or outdoor grill over medium-high heat. Once hot, place the marinated chicken breasts on the grill. Cook for 5-7 minutes per side, or until the internal temperature reaches 165°F (74°C), ensuring the chicken is fully cooked. Remove from the grill and let it rest for 5 minutes.
- Slice the Chicken: Once rested, slice the chicken breasts into thin strips, ready for serving in the burrito bowl.
FOURTH STEP: PREPARE THE BEANS AND CORN
- Sauté the Beans and Corn: Heat olive oil in a large skillet over medium heat. Add the black beans and corn, and sauté for about 5 minutes, stirring occasionally. Add cumin, chili powder, salt, and pepper to taste. Cook for another 2-3 minutes, then remove from heat.
FIFTH STEP: ASSEMBLE THE BOWLS
- Build the Base: In individual bowls, add a scoop of cooked rice as the base.
- Add the Chicken: Layer the sliced chicken on top of the rice.
- Add the Bean and Corn Mixture: Spoon the sautéed beans and corn over the chicken.
- Add the Toppings: Top the bowl with fresh avocado slices, diced red onion, chopped tomatoes, cilantro, shredded lettuce, and cheese (if using).
- Optional Sauce: If desired, drizzle the sour cream or Greek yogurt mixture with lime juice and hot sauce over the top for added creaminess and heat.
FINAL STEP: SERVE AND ENJOY
- Serve: Garnish the Chicken Burrito Bowls with lime wedges for extra zest. Serve immediately for a fresh, satisfying meal. Enjoy the layers of flavor and texture in every bite!
- Prep Time: 20minutes
- Cook Time: 25minutes
Nutrition
- Serving Size: 4
- Calories: 550
- Fat: 25g
- Carbohydrates: 45g
- Protein: 40g
Conclusion
Chicken Burrito Bowls are an easy-to-make, customizable, and wholesome meal perfect for any occasion. Whether you’re preparing it for a family dinner, meal prepping for the week, or enjoying it as a quick lunch, this dish is sure to satisfy your cravings for bold flavors and fresh ingredients. Try it today, and don’t forget to experiment with your favorite toppings and variations to make it your own!