

Discover the Kitchen Tool Everyone Is Raving About!
- • Precision Engineered: Sharp blade with durable craftsmanship.
- • Comfort First: Ergonomic design for effortless slicing.
- • Stylish & Strong: Elegant wood handle meets stainless steel strength.
- • Risk-Free Pick: Thousands of happy home chefs can’t be wrong.
- • Today’s Deal: Just $29.95 instead of $99.85 — limited-time offer!
This post may include affiliate links — learn more here .
Introduction
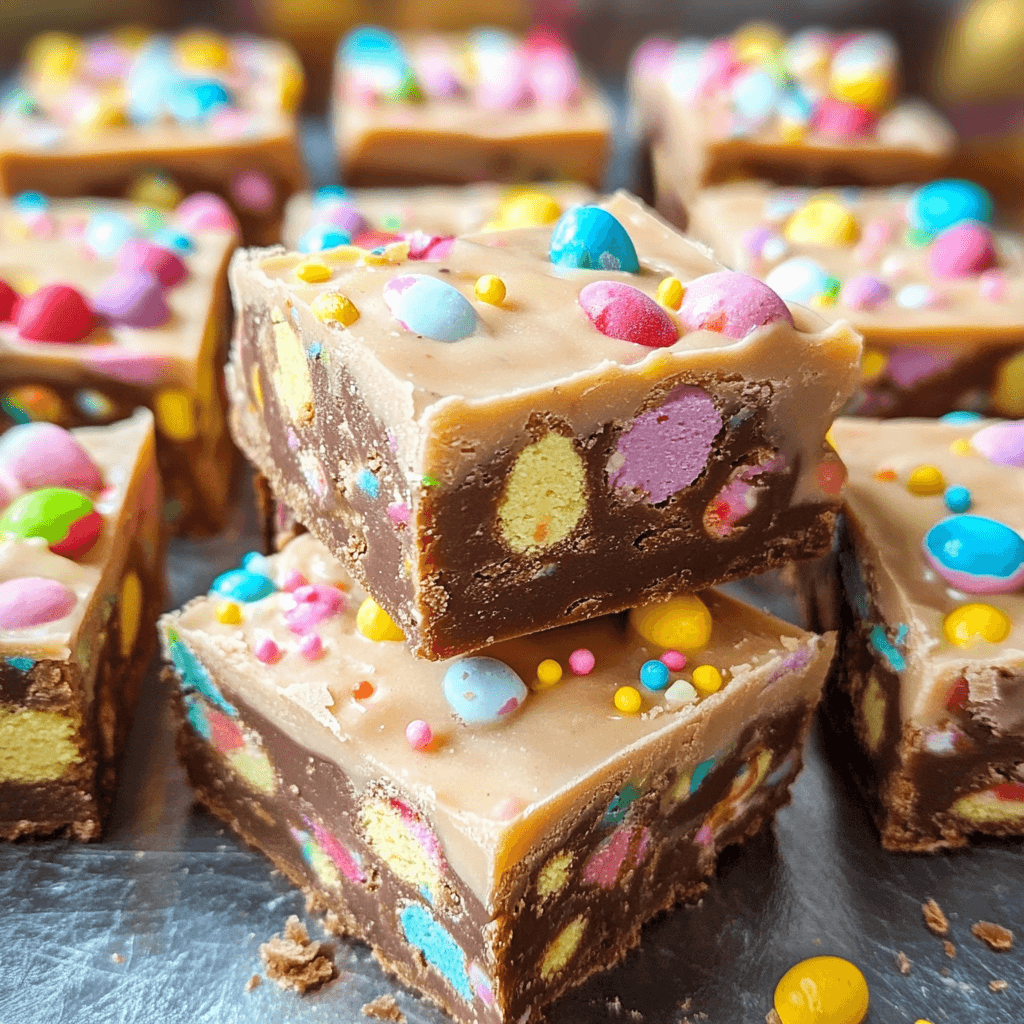
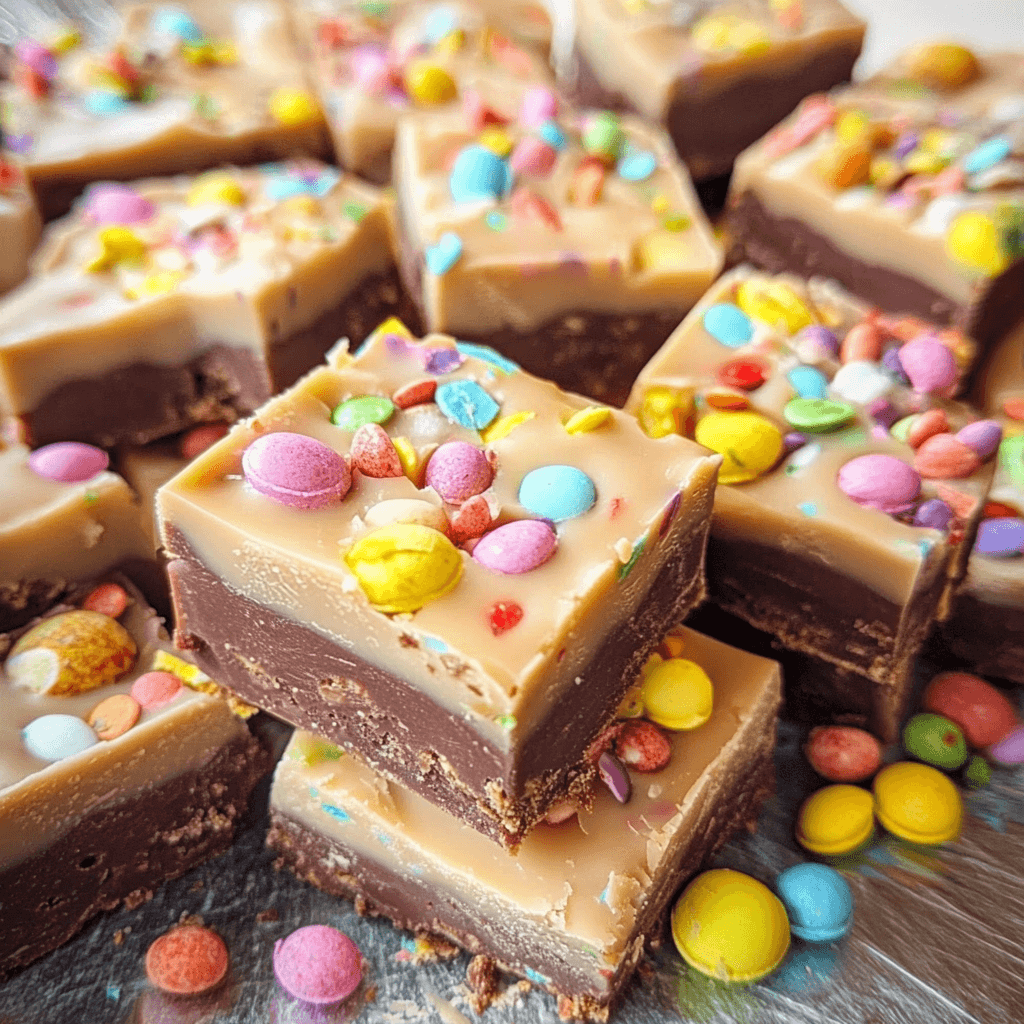
Easter Fudge is a delightful, creamy treat that brings the spirit of Easter to life with its rich flavors and vibrant colors. This fudge combines the sweet, melt-in-your-mouth texture of traditional fudge with festive, colorful ingredients that make it the perfect dessert for any Easter celebration. Whether you’re gathering with family, hosting an Easter brunch, or simply looking for a sweet snack to enjoy, Easter Fudge is sure to be a hit. Made with a few simple ingredients and minimal prep time, this treat can be whipped up in no time and adds a fun, festive touch to any dessert table.
Perfect for:
- Easter celebrations
- Family gatherings
- Afternoon tea
- Holiday gift-giving
- Special treats for kids and adults alike
Why You’ll Love This Easter Fudge
Here’s why Easter Fudge will become your go-to treat for the holiday season:
- Creamy and Smooth: The texture of the fudge is incredibly smooth and creamy, thanks to a combination of chocolate and sweetened condensed milk, which creates a melt-in-your-mouth sensation.
- Vibrant and Festive: With its pastel colors, Easter Fudge is the perfect festive treat to celebrate the holiday and add a pop of color to your dessert table.
- Simple to Make: You only need a few basic ingredients to make Easter Fudge, and the steps are quick and easy. It’s the perfect recipe for a last-minute holiday treat.
- Customizable: You can add your favorite Easter-themed ingredients, like mini candy eggs, marshmallows, or even a drizzle of chocolate to make the fudge your own.
- No-Bake: This is a no-bake recipe, so there’s no need to worry about turning on the oven, making it a great option for those warmer days when you don’t want to heat up the kitchen.
Preparation and Cooking Time
- Total Time: 2 hours (includes chilling)
- Preparation Time: 10 minutes
- Chilling Time: 2 hours
- Servings: 16-20 squares
- Calories per serving: Approximately 150-180 calories
- Key Nutrients: Protein: 2g, Carbs: 22g, Fat: 9g
Ingredients
Here’s what you’ll need to make this vibrant and sweet Easter Fudge:
- 2 cups (12 oz) white chocolate chips
- 1 can (14 oz) sweetened condensed milk
- 1 tablespoon unsalted butter
- 1 teaspoon vanilla extract
- 1 cup mini marshmallows (optional, but great for texture)
- ½ cup pastel-colored candy-coated chocolate eggs (like candy-coated chocolate eggs or similar)
- A pinch of sea salt (optional, for contrast)
- ½ cup chopped pistachios or cashews (optional, for added crunch)
Ingredient Highlights
- White Chocolate Chips: White chocolate serves as the base of this fudge, giving it a rich and creamy texture. It also allows the pastel colors to pop, making this fudge a visual delight.
- Sweetened Condensed Milk: This ingredient is key to achieving the smooth, melt-in-your-mouth consistency of fudge. It adds sweetness and richness.
- Mini Marshmallows: These add a chewy, fun texture to the fudge, making it more indulgent and kid-friendly.
- Pastel Candy-Coated Eggs: These add color, fun, and flavor to the fudge. The candy coating gives a crunchy texture, making it perfect for a festive Easter treat.
- Nuts (Optional): If you prefer some crunch, pistachios or cashews are the perfect choice to add texture and a slight savory balance to the sweet fudge.
Step-by-Step

Follow these simple steps to create the perfect batch of Easter Fudge:
Prepare the Fudge Base:
- Melt the White Chocolate: Begin by placing the white chocolate chips and sweetened condensed milk in a large, microwave-safe bowl. Microwave in 30-second intervals, stirring in between until the mixture is completely melted and smooth. Alternatively, you can melt it using a double boiler if you prefer not to use a microwave.
- Add Butter and Vanilla: Once the white chocolate mixture is smooth and melted, stir in the butter and vanilla extract. Mix well until the butter is fully melted and incorporated, giving the fudge a rich flavor.
Add Mix-Ins:
- Fold in Marshmallows and Candy: Gently fold in the mini marshmallows, pastel candy-coated chocolate eggs, and any other add-ins you prefer (like chopped nuts). The marshmallows will soften slightly in the warm fudge base, adding a chewy texture that contrasts nicely with the crunchy candy.
Set the Fudge:
- Prepare the Pan: Line an 8×8-inch or 9×9-inch baking pan with parchment paper or lightly grease the pan with cooking spray. This will make it easier to remove the fudge once it has set.
- Transfer to Pan: Pour the fudge mixture into the prepared baking pan and spread it out evenly with a spatula. Press down gently to make sure the fudge is packed into the pan, and smooth the top to ensure an even layer.
- Chill the Fudge: Place the fudge in the refrigerator to chill for at least 2 hours or until fully set. This step is important to help the fudge firm up and reach its proper consistency.
Cut and Serve:
- Cut into Squares: Once the fudge is set and firm, remove it from the pan using the parchment paper. Transfer it to a cutting board and cut into small squares or rectangles, depending on your preferred size.
- Serve and Enjoy: Serve your Easter Fudge immediately, or store it in an airtight container for up to 1 week. You can also give it as a gift by packing it in a cute box or jar.
How to Serve Easter Fudge
Easter Fudge can be served in many ways:
- As Part of an Easter Dessert Table: Easter Fudge is a vibrant addition to any dessert spread. Pair it with other festive treats like Easter-themed cookies, mini cupcakes, or chocolate bunnies.
- With Ice Cream: Serve a small square of fudge with a scoop of vanilla ice cream for an indulgent dessert. The creamy ice cream pairs perfectly with the rich fudge.
- As a Snack for Kids: Easter Fudge is great for kids, thanks to its playful appearance and sweet flavors. Pack it in their lunchboxes or serve it at a holiday gathering.
- For Gift-Giving: Cut the fudge into small pieces and wrap them in cellophane bags or pretty gift boxes. This makes for a thoughtful homemade gift for friends and family.
- Alongside Tea or Coffee: Easter Fudge makes an excellent companion to a cup of coffee or tea. Its sweet and creamy flavor balances the richness of your favorite beverage.
Additional Tips for Easter Fudge
Here are a few tips to make your Easter Fudge even better:
- Don’t Overheat the Chocolate: When melting the chocolate, be sure to heat it in short intervals to prevent it from burning. Stirring frequently will ensure a smooth consistency.
- Add Colorful Sprinkles: To make your fudge even more festive, add a few colorful sprinkles on top before chilling it. This adds an extra touch of fun and color.
- Chill for Longer if Needed: If the fudge isn’t firm enough after 2 hours, let it chill for another hour or until it reaches the right texture.
- Experiment with Toppings: You can top the fudge with additional mini eggs, marshmallows, or even edible glitter for a sparkly touch.
- Use High-Quality White Chocolate: The better the quality of the white chocolate you use, the smoother and more flavorful your fudge will be.
Recipe Variations of Easter Fudge
Here are 10 variations of Easter Fudge that you can try to make this recipe your own:
- Chocolate Mint Fudge: Add a few drops of mint extract to the fudge mixture for a minty twist that pairs perfectly with the sweetness of the white chocolate.
- Coconut Easter Fudge: Add shredded coconut to the mixture for a tropical flavor that complements the pastel colors and festive vibe.
- Peanut Butter Easter Fudge: Swirl in some peanut butter into the fudge mixture for a salty-sweet flavor combination that’s irresistible.
- Strawberry Easter Fudge: Add freeze-dried strawberries or a few tablespoons of strawberry jam to the fudge base for a fruity flavor.
- Caramel Easter Fudge: Drizzle caramel sauce over the fudge before it sets, then swirl it in for a rich, sweet twist.
- Cookies and Cream Easter Fudge: Crush some chocolate sandwich cookies (like Oreos) and fold them into the fudge for a fun, crunchy texture.
- S’mores Easter Fudge: Add graham cracker crumbs and mini marshmallows to create a s’mores-inspired version of the fudge.
- Raspberry White Chocolate Fudge: Add fresh or freeze-dried raspberries to the fudge for a tangy contrast to the sweetness of the white chocolate.
- Pistachio Easter Fudge: Add roasted pistachios to the fudge mixture for a unique and slightly savory contrast to the sweetness.
- Orange Creamsicle Easter Fudge: Add a teaspoon of orange zest and a few drops of orange extract for a citrusy twist on the classic fudge.
Freezing and Storage for Easter Fudge
- Freezing: You can freeze Easter Fudge for up to 3 months. Wrap the fudge tightly in plastic wrap or place it in an airtight container before freezing. To serve, thaw it at room temperature or enjoy it frozen as a sweet treat.
- Storage: Store Easter Fudge in an airtight container at room temperature for up to 1 week. If you’re making it ahead of time, refrigerating it will keep it fresh and firm.
Special Equipment for Easter Fudge
Here are some special equipment items you might need to make Easter Fudge:
- 8×8-inch or 9×9-inch Baking Pan: A square pan is the perfect size for making a batch of fudge that’s just the right thickness.
- Microwave-Safe Bowl: For melting the white chocolate and sweetened condensed milk, a microwave-safe bowl makes it easy to stir and heat in intervals.
- Spatula or Spoon: A spatula or spoon is perfect for mixing the fudge and spreading it evenly in the pan.
- Parchment Paper: Lining the pan with parchment paper ensures that the fudge doesn’t stick and makes it easy to remove once set.
- Cooling Rack: A cooling rack helps air circulate around the fudge as it chills, ensuring it sets properly.
FAQ Section about Easter Fudge
- Can I use dark chocolate instead of white chocolate?
Yes, you can substitute dark chocolate for white chocolate if you prefer a less sweet flavor, but it will change the color and taste of the fudge. - Is this recipe suitable for vegetarians?
Yes, this Easter Fudge is suitable for vegetarians, as it contains no meat or animal products (aside from the dairy in the white chocolate and butter). - Can I make this fudge dairy-free?
Yes, you can make the fudge dairy-free by using dairy-free white chocolate and replacing the butter with a plant-based alternative. - Can I add other candy to the fudge?
Absolutely! You can add candy like jelly beans, Easter-themed M&Ms, or crushed candies to the fudge to give it even more flavor and texture. - How do I prevent the fudge from being too soft?
Make sure to refrigerate the fudge for at least 2 hours, or longer if needed. If it’s still too soft, let it chill a bit longer until it firms up.
Easter Fudge
- Total Time: 2hours
Ingredients
-
2 cups (12 oz) white chocolate chips
-
1 can (14 oz) sweetened condensed milk
-
1 tablespoon unsalted butter
-
1 teaspoon vanilla extract
-
1 cup mini marshmallows (optional, but great for texture)
-
½ cup pastel-colored candy-coated chocolate eggs (like candy-coated chocolate eggs or similar)
-
A pinch of sea salt (optional, for contrast)
-
½ cup chopped pistachios or cashews (optional, for added crunch)
Ingredient Highlights
-
White Chocolate Chips: White chocolate serves as the base of this fudge, giving it a rich and creamy texture. It also allows the pastel colors to pop, making this fudge a visual delight.
-
Sweetened Condensed Milk: This ingredient is key to achieving the smooth, melt-in-your-mouth consistency of fudge. It adds sweetness and richness.
-
Mini Marshmallows: These add a chewy, fun texture to the fudge, making it more indulgent and kid-friendly.
-
Pastel Candy-Coated Eggs: These add color, fun, and flavor to the fudge. The candy coating gives a crunchy texture, making it perfect for a festive Easter treat.
-
Nuts (Optional): If you prefer some crunch, pistachios or cashews are the perfect choice to add texture and a slight savory balance to the sweet fudge.
Instructions
Prepare the Fudge Base:
-
Melt the White Chocolate: Begin by placing the white chocolate chips and sweetened condensed milk in a large, microwave-safe bowl. Microwave in 30-second intervals, stirring in between until the mixture is completely melted and smooth. Alternatively, you can melt it using a double boiler if you prefer not to use a microwave.
-
Add Butter and Vanilla: Once the white chocolate mixture is smooth and melted, stir in the butter and vanilla extract. Mix well until the butter is fully melted and incorporated, giving the fudge a rich flavor.
Add Mix-Ins:
-
Fold in Marshmallows and Candy: Gently fold in the mini marshmallows, pastel candy-coated chocolate eggs, and any other add-ins you prefer (like chopped nuts). The marshmallows will soften slightly in the warm fudge base, adding a chewy texture that contrasts nicely with the crunchy candy.
Set the Fudge:
-
Prepare the Pan: Line an 8×8-inch or 9×9-inch baking pan with parchment paper or lightly grease the pan with cooking spray. This will make it easier to remove the fudge once it has set.
-
Transfer to Pan: Pour the fudge mixture into the prepared baking pan and spread it out evenly with a spatula. Press down gently to make sure the fudge is packed into the pan, and smooth the top to ensure an even layer.
-
Chill the Fudge: Place the fudge in the refrigerator to chill for at least 2 hours or until fully set. This step is important to help the fudge firm up and reach its proper consistency.
Cut and Serve:
-
Cut into Squares: Once the fudge is set and firm, remove it from the pan using the parchment paper. Transfer it to a cutting board and cut into small squares or rectangles, depending on your preferred size.
-
Serve and Enjoy: Serve your Easter Fudge immediately, or store it in an airtight container for up to 1 week. You can also give it as a gift by packing it in a cute box or jar.
- Prep Time: 10minutes
Nutrition
- Serving Size: 20
- Calories: 180
- Fat: 9g
- Carbohydrates: 22g
- Protein: 2g
Conclusion
Easter Fudge is the perfect treat to celebrate the holiday with its creamy texture, vibrant colors, and festive ingredients. Whether you’re looking for a quick and easy dessert for your Easter table or a sweet gift to share with loved ones, this fudge is sure to be a crowd-pleaser. With its versatility, simplicity, and delicious flavors, Easter Fudge is sure to become a favorite holiday tradition. Enjoy!