


Discover the Kitchen Tool Everyone Is Raving About!
- • Precision Engineered: Sharp blade with durable craftsmanship.
- • Comfort First: Ergonomic design for effortless slicing.
- • Stylish & Strong: Elegant wood handle meets stainless steel strength.
- • Risk-Free Pick: Thousands of happy home chefs can’t be wrong.
- • Today’s Deal: Just $29.95 instead of $99.85 — limited-time offer!
This post may include affiliate links — learn more here .
Introduction
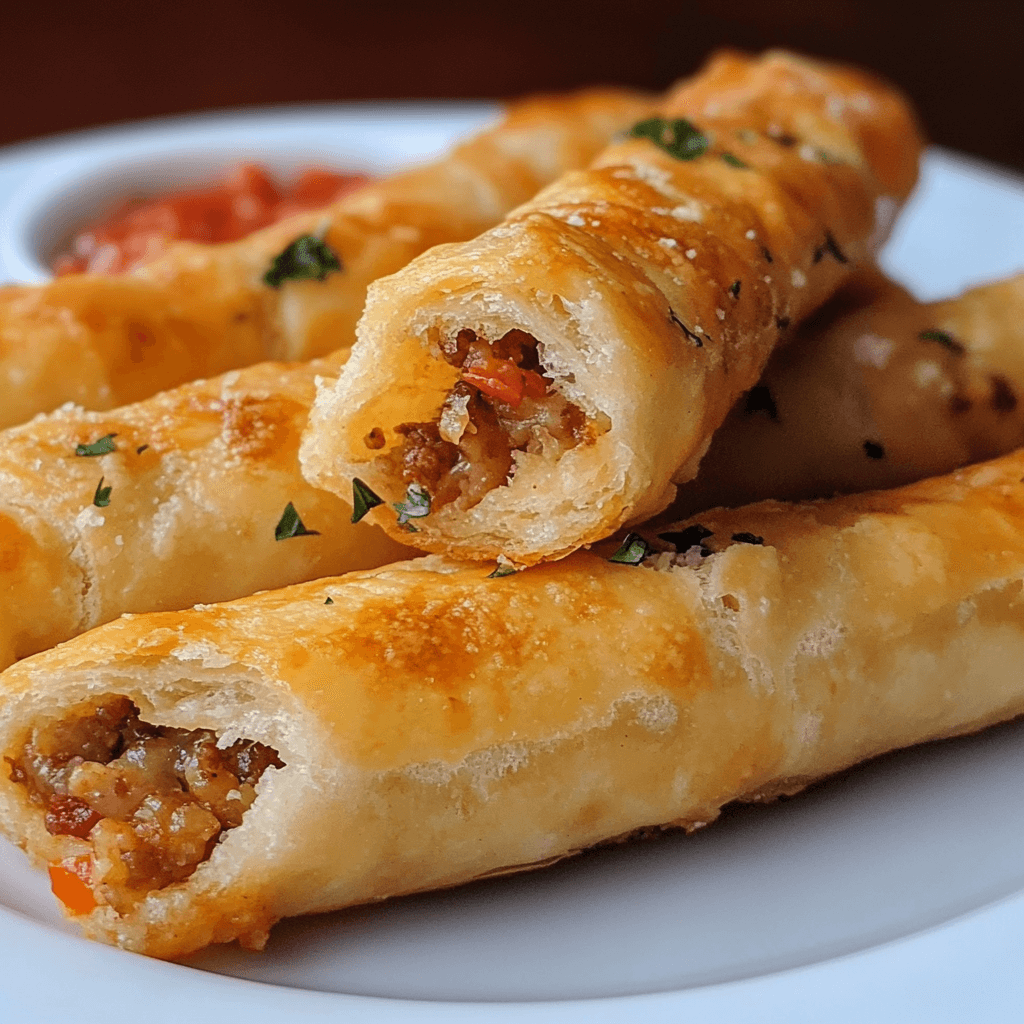
Taco Breadsticks are the perfect fusion of two beloved foods: the rich, savory flavors of tacos and the soft, comforting texture of breadsticks. These Taco Breadsticks are stuffed with seasoned ground beef, melty cheese, and tangy salsa, all wrapped in a golden, crispy breadstick crust. They make for a fun and delicious appetizer, snack, or even a main dish for a family dinner. The beauty of Taco Breadsticks lies in their versatility—they are customizable, easy to make, and loved by everyone, from kids to adults.
Perfect for busy weeknights, game day gatherings, or taco Tuesdays, Taco Breadsticks are sure to become a favorite in your recipe rotation. With minimal prep time and a few simple ingredients, you can whip up these mouthwatering breadsticks in no time. Plus, they’re entirely Halal, so everyone can enjoy them without any worries.
Perfect for:
- Game day snacks
- Family dinners
- Taco Tuesday
- Potlucks or parties
- Sharing with friends and family
Why You’ll Love This Taco Breadsticks Recipe
Here’s why Taco Breadsticks will quickly become your go-to comfort food:
- Savory Taco Flavor: With seasoned ground beef, melted cheese, and salsa, every bite of these breadsticks is bursting with the delicious taste of tacos.
- Crispy and Chewy: The outside of the breadstick is perfectly crispy, while the inside remains soft and chewy—an irresistible combination!
- Customizable: You can easily adjust the fillings to suit your taste, whether you prefer chicken, ground turkey, or a meat-free option like black beans.
- Quick and Easy: With only a few ingredients, Taco Breadsticks come together in a flash, making them an ideal choice for a weeknight meal.
- Halal-Friendly: This recipe ensures that no pork, bacon, wine, or alcohol is used, making it suitable for those who follow Halal dietary guidelines.
Preparation and Cooking Time
- Total Time: 45 minutes
- Preparation Time: 15 minutes
- Cooking Time: 30 minutes
- Servings: 12-16 breadsticks
- Calories per serving: Approximately 200-250 calories
- Key Nutrients: Protein: 10g, Carbs: 25g, Fat: 10g
Ingredients
Here’s what you’ll need to make these delicious Taco Breadsticks:
- For the filling:
- 1 lb ground beef (or Halal chicken or turkey)
- 1 packet taco seasoning (make sure it’s Halal)
- 1/4 cup water
- 1 cup salsa (choose a mild or spicy variety based on your preference)
- 1 ½ cups shredded cheese (cheddar, mozzarella, or a Mexican blend)
- For the breadsticks:
- 2 cans (8 oz each) refrigerated crescent roll dough (ensure Halal certification)
- 1 tablespoon olive oil
- 1 teaspoon garlic powder
- 1 teaspoon dried oregano
- A pinch of salt
- Optional toppings:
- Sour cream
- Guacamole
- Sliced jalapeños
- Fresh cilantro
Ingredient Highlights
- Ground Beef: Ground beef is the traditional filling for taco breadsticks, but you can substitute with chicken, turkey, or even black beans for a vegetarian version.
- Taco Seasoning: Taco seasoning is key to giving these breadsticks their bold, savory flavor. Be sure to check for Halal-certified taco seasoning.
- Salsa: Salsa adds a tangy, flavorful kick to the filling and helps keep everything moist and delicious.
- Shredded Cheese: The cheese melts beautifully and adds creaminess to balance the spices in the filling.
Step-by-Step

Follow these simple steps to make the perfect:
Prepare the Taco Filling:
- Cook the Meat: In a large skillet, heat a bit of olive oil over medium heat. Add the ground beef (or Halal alternative) and cook until browned, breaking it apart with a spoon as it cooks.
- Add Taco Seasoning: Once the meat is cooked through, stir in the taco seasoning and water. Let it simmer for 5-7 minutes, or until the sauce thickens. Remove from heat and set aside to cool slightly.
- Add Salsa and Cheese: Stir in the salsa and 1 cup of shredded cheese. Set the filling aside to cool completely.
Prepare the Breadsticks:
- Preheat the Oven: Preheat your oven to 375°F (190°C). Line a baking sheet with parchment paper for easy cleanup.
- Prepare the Dough: Unroll the crescent roll dough and separate it into individual triangles. You’ll need to press the seams together if the dough comes in perforated triangles.
- Stuff the Breadsticks: Spoon about 1-2 tablespoons of the taco filling onto the wide end of each triangle. Be careful not to overstuff. Roll the dough from the wide end to the tip, sealing the edges as you go.
- Place on Baking Sheet: Arrange the stuffed breadsticks on the prepared baking sheet, leaving a little space between each one.
- Season the Dough: Brush the tops of the breadsticks with olive oil and sprinkle with garlic powder, dried oregano, and a pinch of salt to enhance the flavor.
- Bake: Bake for 12-15 minutes, or until the breadsticks are golden brown and crispy on top.
Serve:
- Serve Hot: Allow the breadsticks to cool for a few minutes before serving. Pair with your favorite dipping sauces like sour cream, guacamole, or salsa.
How to Serve Taco Breadsticks
Can be served in a variety of ways:
- With Dipping Sauces: Serve these breadsticks with a side of sour cream, guacamole, or fresh salsa for dipping. The creamy texture of sour cream balances the spiced filling perfectly.
- As a Party Snack: These breadsticks are perfect for parties or gatherings. Arrange them on a platter alongside other finger foods like nachos, sliders, and mini tacos.
- With a Side Salad: For a complete meal, serve these breadsticks with a simple salad, such as a Mexican-inspired salad with corn, black beans, lettuce, and a lime dressing.
- For Taco Tuesday: Make these breadsticks a regular part of your Taco Tuesday rotation. Pair them with traditional tacos, Mexican rice, and refried beans for a festive meal.
- As a Quick Dinner: These breadsticks are quick to make, making them an ideal option for busy weeknights. Serve them with a side of sautéed vegetables or Mexican street corn.
Additional Tips for Taco Breadsticks
Here are some tips to make your even better:
- Don’t Overstuff the Dough: Be careful not to overstuff the breadsticks with the taco filling, as this can cause them to burst open while baking.
- Seal the Edges Well: Make sure the edges of the dough are properly sealed to prevent the filling from spilling out during baking.
- Customize the Filling: Feel free to add ingredients like black beans, bell peppers, or onions to the taco filling for added flavor and texture.
- Use Leftover Filling: If you have leftover taco filling, store it in an airtight container in the refrigerator for up to 3 days. You can reheat it and serve it on tacos, nachos, or even in wraps.
- Make Ahead: If you’re preparing Taco Breadsticks in advance, you can assemble them and refrigerate them for up to 12 hours before baking. This can save you time when you’re ready to serve.
Recipe Variations of Taco Breadsticks
Here are 10 variations of that you can try:
- Chicken Taco Breadsticks: Swap out the ground beef for shredded chicken seasoned with taco spices for a lighter alternative.
- Vegetarian Taco Breadsticks: Use black beans, corn, and diced bell peppers for a meatless version of these delicious breadsticks.
- BBQ Taco Breadsticks: Swap the salsa for barbecue sauce and add some grilled chicken for a smoky twist on the traditional recipe.
- Spicy Taco Breadsticks: Add chopped jalapeños or a few dashes of hot sauce to the taco filling for extra heat.
- Breakfast Taco Breadsticks: Add scrambled eggs, cooked sausage, and cheese for a breakfast-inspired version of these breadsticks.
- Steak Taco Breadsticks: Use thinly sliced cooked steak in place of ground beef for a more robust flavor.
- Cheesy Taco Breadsticks: Add extra cheese to the filling and top the breadsticks with even more melted cheese for a cheesy indulgence.
- Buffalo Taco Breadsticks: Add buffalo sauce to the taco filling and serve with a side of blue cheese dressing for a spicy, tangy version.
- Fish Taco Breadsticks: Use grilled or battered fish fillets for a light, seafood-based filling that’s perfect for taco night.
- Mango Salsa Taco Breadsticks: Use a sweet and tangy mango salsa instead of regular salsa for a tropical twist on Taco Breadsticks.
Freezing and Storage for Taco Breadsticks
- Freezing: You can freeze for up to 3 months. Once baked and cooled, wrap the breadsticks tightly in plastic wrap or place them in an airtight container. To serve, reheat them in the oven or microwave.
- Storage: Store leftover in an airtight container at room temperature for up to 2 days. You can also refrigerate them for up to 4 days. Reheat before serving to restore their crispy texture.
Special Equipment for Taco Breadsticks
Here are some special equipment items you might need to make:
- Baking Sheet: A large baking sheet is essential for baking the breadsticks evenly.
- Parchment Paper: Line your baking sheet with parchment paper to prevent the breadsticks from sticking.
- Skillet: A nonstick skillet is perfect for cooking the taco filling without it sticking to the pan.
- Silicone Spatula: A silicone spatula helps to stir the taco filling and handle the dough gently without sticking.
- Measuring Cups and Spoons: Accurate measurements help ensure the right amount of ingredients for a successful recipe.
FAQ Section about Taco Breadsticks
- Can I use a different type of meat?
Yes! You can substitute ground beef with ground chicken, turkey, or even use black beans for a vegetarian version. - Can I make these gluten-free?
Yes, you can use gluten-free crescent roll dough or make your own gluten-free dough to substitute the regular crescent rolls. - Can I use store-bought taco seasoning?
Yes, store-bought taco seasoning works perfectly as long as it’s Halal-certified. - Can I add more vegetables?
Absolutely! Feel free to add bell peppers, onions, corn, or even spinach to the taco filling for more flavor and nutrition. - Can I make Taco Breadsticks ahead of time?
Yes, you can assemble the breadsticks in advance and refrigerate them for up to 12 hours before baking. This saves time when you’re ready to serve them.

Taco Breadsticks
- Total Time: 45minutes
Ingredients
-
For the filling:
-
1 lb ground beef (or Halal chicken or turkey)
-
1 packet taco seasoning (make sure it’s Halal)
-
1/4 cup water
-
1 cup salsa (choose a mild or spicy variety based on your preference)
-
1 ½ cups shredded cheese (cheddar, mozzarella, or a Mexican blend)
-
-
For the breadsticks:
-
2 cans (8 oz each) refrigerated crescent roll dough (ensure Halal certification)
-
1 tablespoon olive oil
-
1 teaspoon garlic powder
-
1 teaspoon dried oregano
-
A pinch of salt
-
-
Optional toppings:
-
Sour cream
-
Guacamole
-
Sliced jalapeños
-
Fresh cilantro
-
Ingredient Highlights
-
Ground Beef: Ground beef is the traditional filling for taco breadsticks, but you can substitute with chicken, turkey, or even black beans for a vegetarian version.
-
Taco Seasoning: Taco seasoning is key to giving these breadsticks their bold, savory flavor. Be sure to check for Halal-certified taco seasoning.
-
Salsa: Salsa adds a tangy, flavorful kick to the filling and helps keep everything moist and delicious.
-
Shredded Cheese: The cheese melts beautifully and adds creaminess to balance the spices in the filling.
Instructions
Prepare the Taco Filling:
-
Cook the Meat: In a large skillet, heat a bit of olive oil over medium heat. Add the ground beef (or Halal alternative) and cook until browned, breaking it apart with a spoon as it cooks.
-
Add Taco Seasoning: Once the meat is cooked through, stir in the taco seasoning and water. Let it simmer for 5-7 minutes, or until the sauce thickens. Remove from heat and set aside to cool slightly.
-
Add Salsa and Cheese: Stir in the salsa and 1 cup of shredded cheese. Set the filling aside to cool completely.
Prepare the Breadsticks:
-
Preheat the Oven: Preheat your oven to 375°F (190°C). Line a baking sheet with parchment paper for easy cleanup.
-
Prepare the Dough: Unroll the crescent roll dough and separate it into individual triangles. You’ll need to press the seams together if the dough comes in perforated triangles.
-
Stuff the Breadsticks: Spoon about 1-2 tablespoons of the taco filling onto the wide end of each triangle. Be careful not to overstuff. Roll the dough from the wide end to the tip, sealing the edges as you go.
-
Place on Baking Sheet: Arrange the stuffed breadsticks on the prepared baking sheet, leaving a little space between each one.
-
Season the Dough: Brush the tops of the breadsticks with olive oil and sprinkle with garlic powder, dried oregano, and a pinch of salt to enhance the flavor.
-
Bake: Bake for 12-15 minutes, or until the breadsticks are golden brown and crispy on top.
Serve:
-
Serve Hot: Allow the breadsticks to cool for a few minutes before serving. Pair with your favorite dipping sauces like sour cream, guacamole, or salsa.
- Prep Time: 15minutes
- Cook Time: 30minutes
Nutrition
- Serving Size: 16
- Calories: 250
- Fat: 10g
- Carbohydrates: 25g
- Protein: 10g
Conclusion of Taco Breadsticks
Taco Breadsticks are a fun, delicious, and customizable way to enjoy the flavors of tacos in a new and exciting form. Whether you’re making them for a family dinner, a party snack, or a quick weeknight meal, these breadsticks are sure to impress. With their savory filling, cheesy goodness, and crispy texture, Taco Breadsticks are a guaranteed crowd-pleaser. And with the ability to adjust the filling to your taste, these versatile breadsticks can be enjoyed by everyone—no matter their dietary preferences. Enjoy!