

Discover the Kitchen Tool Everyone Is Raving About!
- • Precision Engineered: Sharp blade with durable craftsmanship.
- • Comfort First: Ergonomic design for effortless slicing.
- • Stylish & Strong: Elegant wood handle meets stainless steel strength.
- • Risk-Free Pick: Thousands of happy home chefs can’t be wrong.
- • Today’s Deal: Just $29.95 instead of $99.85 — limited-time offer!
This post may include affiliate links — learn more here .
Introduction
Breakfast is often regarded as the most important meal of the day, but for many, it’s also the most challenging to find time for. Between rushing to get to work, managing family obligations, or getting the kids ready for school, it can be easy to skip a nourishing breakfast. However, Freezer Breakfast Sandwiches offer a simple solution—prep them ahead of time and enjoy a delicious, satisfying breakfast that’s ready to go when you are.
These sandwiches are the perfect combination of convenience and taste. Made with wholesome ingredients and packed with protein, they can be customized to suit different dietary preferences and tastes. Whether you’re looking for a classic egg, cheese, and sausage sandwich, or a more plant-based version, Freezer Breakfast Sandwiches are versatile and easy to make in bulk.
In this article, we’ll guide you through how to prepare these breakfast sandwiches, share tips on ingredient variations, and discuss how to store and reheat them for the ultimate breakfast on-the-go experience. Let’s get started on making your mornings a little easier and a lot more delicious!
Why You’ll Love This Recipe
- Perfect for Busy Mornings: These sandwiches are ideal for people on the go. Prepare them in advance, freeze, and simply heat them up when you’re ready to eat.
- Customizable: Whether you prefer a classic sandwich with eggs and cheese or a vegan version with plant-based ingredients, you can easily adjust this recipe to suit your preferences.
- Protein-Packed: These sandwiches are filled with protein-rich ingredients, providing lasting energy throughout the morning.
- Family-Friendly: Both kids and adults will love these sandwiches. You can tailor the fillings to suit picky eaters while still serving up something nutritious.
- Halal-Friendly: This recipe is completely halal, as it avoids pork, bacon, and wine. You can also opt for halal-certified meats or plant-based alternatives.
Preparation Time and Servings
- Total Time: 1 hour (30 minutes for prep, 30 minutes for assembling and freezing)
- Servings: This recipe yields 8-12 sandwiches, depending on how large you make them.
- Nutrition Facts (per serving): Calories: 300-400, Protein: 20g, Carbs: 30g, Fat: 15g.
Ingredients
Sandwich Base:
- 8 whole wheat English muffins: Whole wheat muffins provide a hearty and healthy base for the sandwiches, offering fiber and a slightly nutty flavor.
- 4 large eggs: Eggs are a breakfast essential, offering protein and texture.
- 1 tablespoon olive oil: For frying the eggs.
- 2 tablespoons milk: To make the eggs extra creamy.
- 1 cup shredded cheese: You can use cheddar, mozzarella, or any cheese of your choice.
- 8 halal chicken sausage patties: These sausages are flavorful and protein-packed. You can find halal-certified chicken sausage at many grocery stores.
- 1 tablespoon butter: For greasing the skillet to cook the sausage patties.
- 1 tablespoon fresh herbs (optional): Fresh parsley or chives can be added for extra flavor in the eggs or as a garnish.
Plant-Based Option:
- 8 plant-based sausages: Look for vegan or plant-based sausage options in your local grocery store.
- Vegan cheese: If you’re following a dairy-free diet, you can swap the cheese for a dairy-free alternative.
- 1 avocado (optional): A sliced avocado can be added to each sandwich for extra richness and healthy fats.
Spreads:
- 1/4 cup mayonnaise or vegan mayo: A simple spread that adds creaminess and flavor.
- 1 tablespoon Dijon mustard: For a hint of tangy heat.
- 1 tablespoon honey: A touch of sweetness that complements the savory elements of the sandwich.
- Sriracha or hot sauce (optional): If you like a bit of spice, feel free to drizzle some hot sauce onto your sandwich.
Step-by-Step
 Preparation
FIRST STEP: COOK THE SAUSAGES
- Cook the Chicken Sausage: Heat a skillet over medium heat and add the butter. Once melted, place the chicken sausage patties in the skillet and cook for about 5-6 minutes on each side until they are golden brown and fully cooked through. If using plant-based sausages, cook according to the package instructions, usually over medium heat for about 5 minutes on each side.
- Set Aside: Once the sausages are cooked, remove them from the skillet and set them aside to cool.
SECOND STEP: PREPARE THE EGGS
- Whisk the Eggs: Crack the eggs into a mixing bowl. Add the milk, a pinch of salt, and pepper to taste, and whisk them together until the mixture is smooth and slightly frothy.
- Cook the Eggs: In the same skillet used for the sausage, add a teaspoon of olive oil and heat it over medium-low. Pour in the egg mixture, swirling it around the pan. Stir occasionally to prevent the eggs from sticking and to ensure they cook evenly. Cook until the eggs are just set but still soft and creamy. Remove from the heat.
THIRD STEP: ASSEMBLE THE SANDWICHES
- Toast the English Muffins: Slice the whole wheat English muffins in half and toast them lightly in a toaster or on a skillet until golden brown.
- Add the Sauces: Spread a thin layer of mayo on the bottom half of each muffin and a little Dijon mustard on the top half. You can also drizzle a little honey or hot sauce depending on your taste preferences.
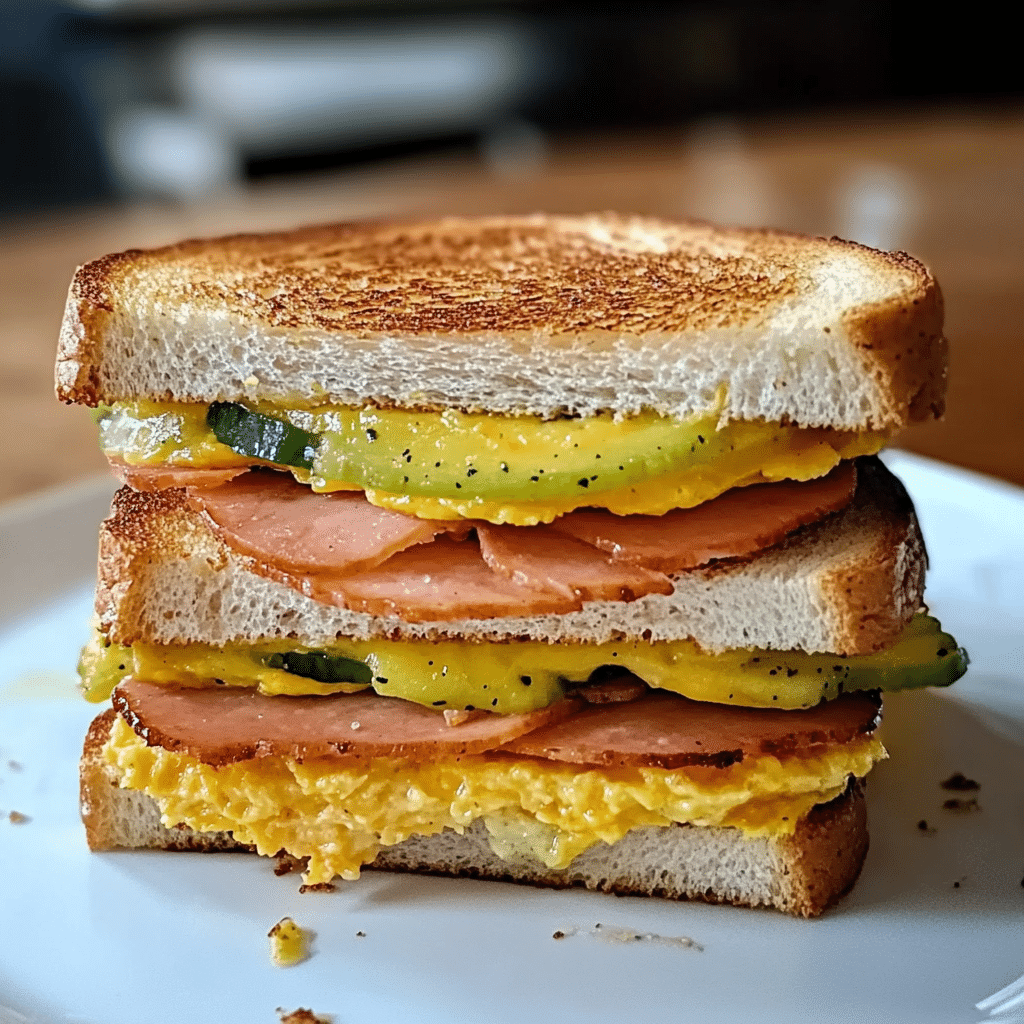
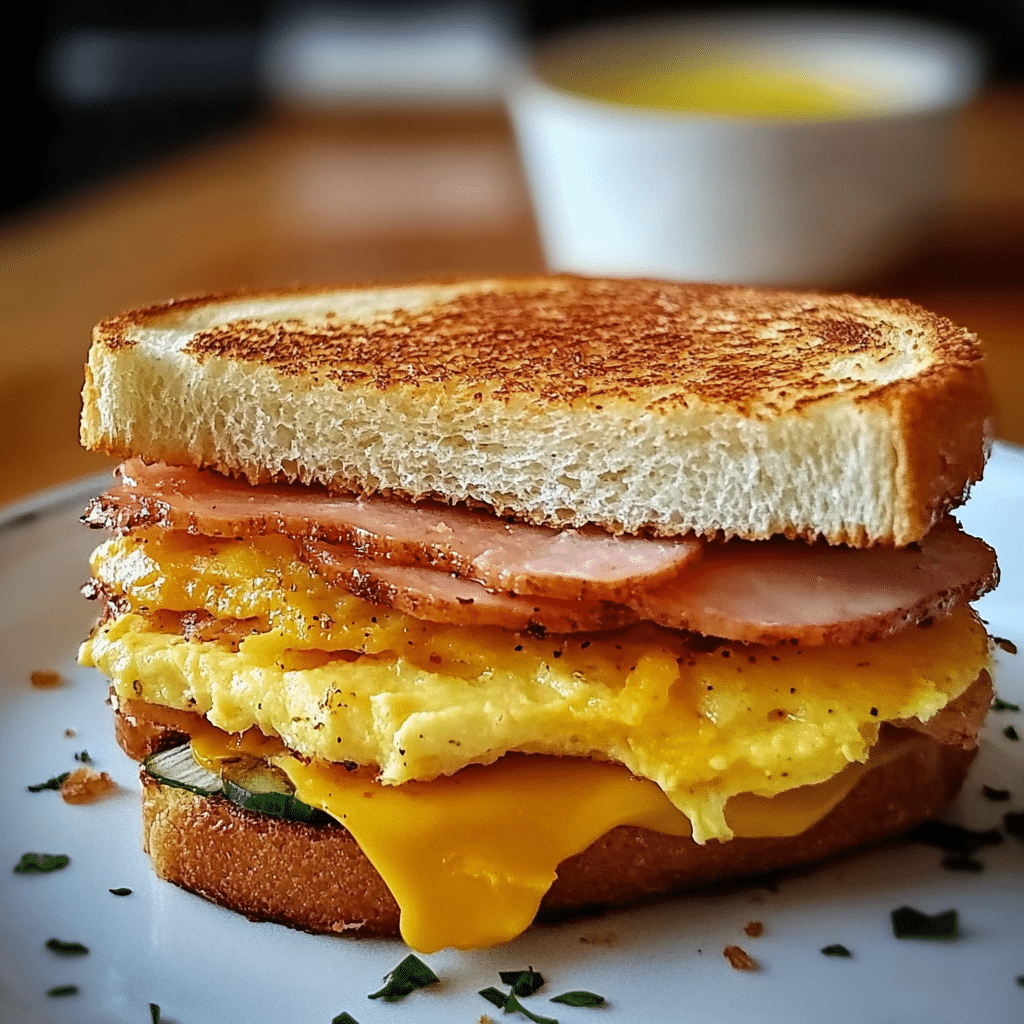
- Layer the Ingredients: On the bottom half of each muffin, place a cooked sausage patty, followed by a generous scoop of scrambled eggs. Add a handful of shredded cheese on top of the eggs while they are still warm to allow the cheese to melt.
- Assemble the Sandwich: Place the top half of the muffin on top of the cheese and egg layers, pressing gently to close the sandwich.
FOURTH STEP: FREEZE THE SANDWICHES
- Wrap and Freeze: Wrap each sandwich tightly in plastic wrap or parchment paper. Then place the wrapped sandwiches into a freezer-safe plastic bag or container, making sure they’re sealed properly to prevent freezer burn.
- Label and Store: Label the bag or container with the date of preparation so you can keep track of when they were made. Store the sandwiches in the freezer for up to 3 months.
FINAL STEP: REHEAT AND ENJOY
- Reheat the Sandwiches: When you’re ready to eat, remove a sandwich from the freezer. Unwrap it and place it on a microwave-safe plate. Microwave on high for 1 to 2 minutes, or until heated through. Alternatively, you can reheat it in a toaster oven or conventional oven at 350°F (175°C) for about 10-15 minutes, until the sandwich is hot and the cheese has melted.
- Serve and Enjoy: Serve your Freezer Breakfast Sandwich immediately. You can enjoy it with a side of fruit, a smoothie, or a cup of coffee for a complete breakfast.
How to Serve Freezer Breakfast Sandwiches
These sandwiches are incredibly versatile and can be served in many different ways. Here are some ideas for how to serve them:
1. Quick and Easy Breakfast
The most straightforward way to serve these sandwiches is as a simple breakfast on-the-go. You can grab one from the freezer, heat it up, and eat it while getting ready for your day.
2. Pair with Fresh Fruit
To add a refreshing balance to your sandwich, serve it alongside a bowl of fresh fruit. Berries, apple slices, or citrus segments provide a fresh, tangy contrast to the richness of the sandwich.
3. Serve with a Smoothie
For a well-rounded breakfast, pair your sandwich with a smoothie. A fruit-based smoothie or a green smoothie with spinach, banana, and almond milk complements the savory sandwich beautifully.
4. Make It a Brunch Buffet
If you’re serving a group or having a weekend brunch, these Freezer Breakfast Sandwiches make an excellent addition to a spread. Offer a variety of sandwich fillings and spreads so that everyone can customize their breakfast to their liking.
Additional Tips
- Make-Ahead: Prepare these sandwiches in bulk and store them in the freezer so you have a quick breakfast option ready for the whole week or even longer.
- Meal Prep: If you’re following a meal prep routine, these sandwiches are a great addition to your weekly plan. Simply heat one up each morning to get your day started on the right foot.
- Vegan and Gluten-Free Options: If you follow a vegan or gluten-free diet, simply swap out the cheese and sausages for plant-based and gluten-free alternatives to suit your needs.
Recipe Variations
Although this recipe is fantastic as written, you can easily customize it to suit different tastes and dietary preferences:
1. Cheese Varieties
Switch up the cheese for different flavors. Consider using sharp cheddar, pepper jack, or even a creamy goat cheese for a more gourmet twist.
2. Vegetarian Version
For a meatless option, use plant-based sausage patties or swap them with roasted vegetables like mushrooms, spinach, and bell peppers.
3. Spicy Kick
Add a little heat to your sandwich by including sliced jalapeños or a spicy salsa in place of the Dijon mustard. A touch of chipotle mayo can also bring a smoky heat to the sandwich.
Freezing and Storage
These sandwiches are freezer-friendly and can be stored for up to 3 months. Be sure to wrap them tightly in plastic wrap or parchment paper to avoid freezer burn. You can store them in an airtight container or freezer bag for easy access.
Freezing Instructions:
- Wrap each sandwich individually in plastic wrap or parchment paper.
- Place the wrapped sandwiches in a large freezer bag or container.
- Label with the date of preparation.
Thawing and Reheating:
- To reheat from frozen: Microwave for 1-2 minutes or bake at 350°F (175°C) for 10-15 minutes.
- To thaw: Leave the sandwich in the fridge overnight and heat in the morning for a freshly-made taste.
Special Equipment
While you don’t need a lot of specialized equipment to make Freezer Breakfast Sandwiches, having a few key kitchen tools will help make the process easier and more efficient. Here are some essential items to consider:
- Baking Sheets: You’ll need a few baking sheets for cooking the eggs, baking the muffins, and heating any pre-cooked ingredients. Having more than one sheet can make things go faster, especially if you’re preparing multiple sandwiches at once.
- Parchment Paper or Aluminum Foil: These are useful for lining baking sheets and wrapping your sandwiches for the freezer. They make cleanup easier and help prevent the sandwiches from sticking.
- Large Skillet or Frying Pan: A large skillet is ideal for cooking the breakfast meats (if used) and any other fillings like mushrooms or vegetables. You can also use it to toast the sandwich muffins.
- Sharp Knife: To slice your sandwiches in half after they’re assembled, a sharp knife ensures you get clean, even cuts, which is particularly important for presentation if you’re making these for guests.
- Plastic Wrap or Sandwich Wraps: For wrapping your sandwiches for the freezer, you can use plastic wrap or even specialty sandwich wraps that help preserve the freshness of your sandwiches.
- Freezer Bags or Containers: You’ll need high-quality freezer bags or airtight containers to store your pre-made sandwiches. This helps to prevent freezer burn and maintain the flavor and texture of your sandwiches.
- Cooling Rack: If you want to prevent your sandwiches from becoming soggy while they cool, place them on a cooling rack. This allows air circulation around the sandwich and keeps the bread from absorbing moisture.
Having these tools will streamline the process, making it easier to prepare your sandwiches, store them for later, and ensure the best possible results when you reheat them.
FAQ (Frequently Asked Questions)
1. Can I make these sandwiches ahead of time and freeze them?
Yes! The main appeal of Freezer Breakfast Sandwiches is that they are designed to be made ahead of time. After assembling the sandwiches, you can wrap them tightly and freeze them for up to 3 months. When you’re ready to eat them, simply reheat them in the microwave, oven, or toaster oven.
2. Can I use any bread for the sandwiches?
Yes, you can use different types of bread, such as bagels, English muffins, or even croissants. If you’re looking for a healthier option, consider using whole wheat or whole grain bread. Just be sure the bread you choose can hold up when frozen and reheated.
3. Can I use store-bought English muffins or do I have to make them from scratch?
While homemade English muffins are a great option for these sandwiches, store-bought muffins work just as well and are much quicker to use. You can pick up your favorite brand, or choose whole wheat or gluten-free versions for a healthier alternative.
4. How do I reheat these breakfast sandwiches?
There are several ways to reheat your Freezer Breakfast Sandwiches:
- Microwave: Wrap the sandwich in a damp paper towel and microwave for 1-2 minutes, depending on the strength of your microwave, until heated through.
- Oven: Preheat your oven to 350°F (175°C) and bake the sandwiches for about 10-15 minutes, or until they’re warm and the cheese is melted.
- Toaster Oven: Preheat the toaster oven to 350°F (175°C) and bake for 8-10 minutes, checking to ensure they are heated through.
5. Can I make these sandwiches without cheese?
Yes, you can omit the cheese if you’re lactose intolerant or prefer a dairy-free version. You can substitute with a dairy-free cheese alternative, or simply enjoy the sandwiches without cheese, adding more flavorful fillings like sautéed vegetables or avocado to make up for it.
Print
Freezer Breakfast Sandwiches
- Total Time: 1hour
Ingredients
For the Sandwich Base:
- 8 whole wheat English muffins: Whole wheat muffins provide a hearty and healthy base for the sandwiches, offering fiber and a slightly nutty flavor.
- 4 large eggs: Eggs are a breakfast essential, offering protein and texture.
- 1 tablespoon olive oil: For frying the eggs.
- 2 tablespoons milk: To make the eggs extra creamy.
- 1 cup shredded cheese: You can use cheddar, mozzarella, or any cheese of your choice.
- 8 halal chicken sausage patties: These sausages are flavorful and protein-packed. You can find halal-certified chicken sausage at many grocery stores.
- 1 tablespoon butter: For greasing the skillet to cook the sausage patties.
- 1 tablespoon fresh herbs (optional): Fresh parsley or chives can be added for extra flavor in the eggs or as a garnish.
For the Plant-Based Option:
- 8 plant-based sausages: Look for vegan or plant-based sausage options in your local grocery store.
- Vegan cheese: If you’re following a dairy-free diet, you can swap the cheese for a dairy-free alternative.
- 1 avocado (optional): A sliced avocado can be added to each sandwich for extra richness and healthy fats.
For the Spreads:
- 1/4 cup mayonnaise or vegan mayo: A simple spread that adds creaminess and flavor.
- 1 tablespoon Dijon mustard: For a hint of tangy heat.
- 1 tablespoon honey: A touch of sweetness that complements the savory elements of the sandwich.
- Sriracha or hot sauce (optional): If you like a bit of spice, feel free to drizzle some hot sauce onto your sandwich.
Instructions
FIRST STEP: COOK THE SAUSAGES
- Cook the Chicken Sausage: Heat a skillet over medium heat and add the butter. Once melted, place the chicken sausage patties in the skillet and cook for about 5-6 minutes on each side until they are golden brown and fully cooked through. If using plant-based sausages, cook according to the package instructions, usually over medium heat for about 5 minutes on each side.
- Set Aside: Once the sausages are cooked, remove them from the skillet and set them aside to cool.
SECOND STEP: PREPARE THE EGGS
- Whisk the Eggs: Crack the eggs into a mixing bowl. Add the milk, a pinch of salt, and pepper to taste, and whisk them together until the mixture is smooth and slightly frothy.
- Cook the Eggs: In the same skillet used for the sausage, add a teaspoon of olive oil and heat it over medium-low. Pour in the egg mixture, swirling it around the pan. Stir occasionally to prevent the eggs from sticking and to ensure they cook evenly. Cook until the eggs are just set but still soft and creamy. Remove from the heat.
THIRD STEP: ASSEMBLE THE SANDWICHES
- Toast the English Muffins: Slice the whole wheat English muffins in half and toast them lightly in a toaster or on a skillet until golden brown.
- Add the Sauces: Spread a thin layer of mayo on the bottom half of each muffin and a little Dijon mustard on the top half. You can also drizzle a little honey or hot sauce depending on your taste preferences.
- Layer the Ingredients: On the bottom half of each muffin, place a cooked sausage patty, followed by a generous scoop of scrambled eggs. Add a handful of shredded cheese on top of the eggs while they are still warm to allow the cheese to melt.
- Assemble the Sandwich: Place the top half of the muffin on top of the cheese and egg layers, pressing gently to close the sandwich.
FOURTH STEP: FREEZE THE SANDWICHES
- Wrap and Freeze: Wrap each sandwich tightly in plastic wrap or parchment paper. Then place the wrapped sandwiches into a freezer-safe plastic bag or container, making sure they’re sealed properly to prevent freezer burn.
- Label and Store: Label the bag or container with the date of preparation so you can keep track of when they were made. Store the sandwiches in the freezer for up to 3 months.
FINAL STEP: REHEAT AND ENJOY
- Reheat the Sandwiches: When you’re ready to eat, remove a sandwich from the freezer. Unwrap it and place it on a microwave-safe plate. Microwave on high for 1 to 2 minutes, or until heated through. Alternatively, you can reheat it in a toaster oven or conventional oven at 350°F (175°C) for about 10-15 minutes, until the sandwich is hot and the cheese has melted.
- Serve and Enjoy: Serve your Freezer Breakfast Sandwich immediately. You can enjoy it with a side of fruit, a smoothie, or a cup of coffee for a complete breakfast.
- Prep Time: 30minutes
Nutrition
- Serving Size: 12
- Calories: 400
- Fat: 15g
- Carbohydrates: 30g
- Protein: 20g
Conclusion
Freezer Breakfast Sandwiches are a game-changer for busy mornings. They’re quick, easy, nutritious, and customizable to your liking. Whether you prefer a classic breakfast sandwich with egg and sausage or a plant-based version, these sandwiches are sure to become a staple in your kitchen.
With simple preparation and the convenience of freezing, you’ll never have to skip breakfast again. Take the stress out of your morning routine, and enjoy a tasty, homemade breakfast every day. Don’t forget to share your creations on social media—I’d love to see how you make this recipe your own. Enjoy every bite!