

Discover the Kitchen Tool Everyone Is Raving About!
- • Precision Engineered: Sharp blade with durable craftsmanship.
- • Comfort First: Ergonomic design for effortless slicing.
- • Stylish & Strong: Elegant wood handle meets stainless steel strength.
- • Risk-Free Pick: Thousands of happy home chefs can’t be wrong.
- • Today’s Deal: Just $29.95 instead of $99.85 — limited-time offer!
This post may include affiliate links — learn more here .
Introduction
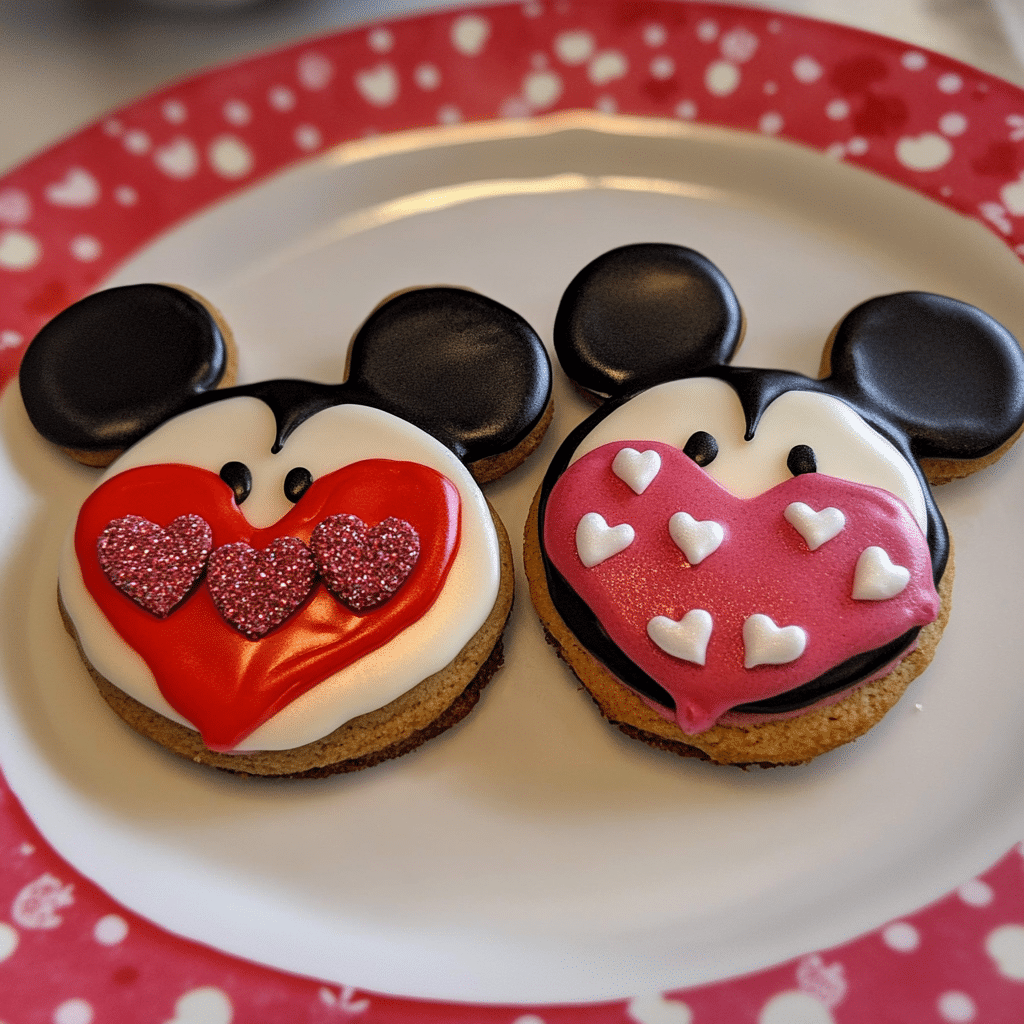
Mickey and Minnie Valentine’s Cookies are the perfect sweet treat to celebrate love and Disney magic. Whether you’re baking for a special someone, your kids, or a Disney-loving friend, these heart-shaped cookies decorated with Mickey and Minnie designs are sure to impress. The combination of buttery, tender cookies and colorful royal icing creates a delightful dessert that’s as charming as it is delicious. Easy to make and fun to decorate, these cookies are ideal for any Valentine’s celebration.
Perfect for:
- Valentine’s Day treats
- Disney-themed parties
- Gift-giving
- Family baking sessions
- Surprise snacks for loved ones
- Mickey and Minnie fans
Why You’ll Love This Recipe
Here’s why Mickey and Minnie Valentine’s Cookies will become a favorite in your baking repertoire:
- Cute Disney Themes: The Mickey and Minnie designs are perfect for fans of Disney, making these cookies a fun and whimsical addition to any Valentine’s Day celebration.
- Buttery, Soft Texture: These cookies have a soft, melt-in-your-mouth texture with just the right amount of sweetness.
- Customizable Designs: You can decorate the cookies with royal icing to create personalized Mickey and Minnie designs or even add special messages to make them extra special.
- Kid-Friendly: Kids will love helping you decorate the cookies, making it a fun family activity.
- Easy to Make: With simple ingredients and clear instructions, these cookies are easy to bake and decorate.
Preparation and Cooking Time
- Total Time: 2 hours (including cooling and decorating time)
- Preparation Time: 30 minutes
- Baking Time: 10-12 minutes
- Servings: 12-16 cookies
- Calories per Serving: Approximately 150-200 calories per cookie (depending on size and icing)
- Key Nutrients: Protein: 2g, Carbs: 25g, Fat: 8g
Ingredients
Here’s what you’ll need to make these delightful Mickey and Minnie Valentine’s Cookies:
For the Cookie Dough:
- 2 ¾ cups all-purpose flour
- 1 teaspoon baking powder
- ¼ teaspoon salt
- 1 cup (2 sticks) unsalted butter, softened
- 1 cup granulated sugar
- 1 large egg
- 1 teaspoon vanilla extract
- 1 teaspoon almond extract (optional for extra flavor)
- 2 tablespoons milk (or dairy-free alternative)
For the Royal Icing:
- 2 egg whites (or use powdered egg whites for a halal version)
- 2 ½ cups powdered sugar, sifted
- 1 teaspoon lemon juice or water (to adjust consistency)
- Gel food coloring (red, black, white, and pink for Mickey and Minnie designs)
- A pinch of cream of tartar (optional, for stiffening)
Ingredient Highlights
- Butter: The softened butter creates a rich, smooth dough that helps the cookies bake to a perfect consistency—soft and slightly chewy.
- Sugar: Granulated sugar sweetens the dough and gives the cookies a delicate crisp on the edges.
- Vanilla and Almond Extract: These extracts enhance the flavor of the cookies and give them a delightful aroma.
- Royal Icing: Royal icing is the perfect medium for decorating sugar cookies. It hardens beautifully, allowing for intricate designs like Mickey and Minnie’s faces and heart shapes.
- Gel Food Coloring: For decorating, gel food coloring is ideal because it creates vibrant, long-lasting colors without watering down the icing.
Step-by-Step

Follow these steps to create Mickey and Minnie Valentine’s Cookies:
Prepare the Cookie Dough:
- Preheat the Oven: Preheat your oven to 350°F (175°C). Line two baking sheets with parchment paper or silicone baking mats to prevent the cookies from sticking.
- Mix the Dry Ingredients: In a medium bowl, whisk together the flour, baking powder, and salt. Set aside.
- Cream the Butter and Sugar: In a large mixing bowl, beat the softened butter and granulated sugar together until light and fluffy (about 2-3 minutes).
- Add Wet Ingredients: Beat in the egg, vanilla extract, and almond extract (if using). Mix until fully combined.
- Combine Wet and Dry Ingredients: Gradually add the dry ingredients to the butter mixture, mixing on low speed. Add the milk and continue mixing until a soft dough forms. The dough should come together and not be too sticky.
- Chill the Dough: Divide the dough in half, flatten it into discs, wrap each in plastic wrap, and refrigerate for at least 30 minutes. Chilling the dough helps prevent the cookies from spreading too much while baking.
Roll Out and Cut the Cookies:
- Roll Out the Dough: Once chilled, remove the dough from the fridge and roll it out on a lightly floured surface to about ¼-inch thickness.
- Cut the Cookies: Use a heart-shaped or round cookie cutter to cut out the cookies. If you want to create Mickey and Minnie shapes, use a heart cutter for the body and two round cutters for the ears. Place the cookies on the prepared baking sheets.
- Bake the Cookies: Bake the cookies in the preheated oven for 10-12 minutes or until the edges are lightly golden. Keep a close eye on them to avoid overbaking.
- Cool: Allow the cookies to cool on the baking sheets for 5 minutes before transferring them to a wire rack to cool completely.
Decorate the Cookies:
- Prepare the Royal Icing: In a large bowl, beat the egg whites (or powdered egg whites and water) with a hand mixer until frothy. Gradually add the powdered sugar, continuing to beat until stiff peaks form. Add lemon juice or water to adjust the consistency to your liking. Divide the icing into several bowls and color each portion with gel food coloring (red, black, white, and pink for Minnie and Mickey designs).
- Pipe the Icing: Once the cookies have cooled, use a piping bag fitted with small tips to outline and flood the cookies with royal icing. Start with the white icing to create the base for Mickey and Minnie’s faces, and then use black for their ears, red for Minnie’s bow, and pink for accents. Allow the cookies to dry completely before serving or packaging them.

How to Serve Mickey and Minnie Valentine’s Cookies
Mickey and Minnie Valentine’s Cookies can be served in several creative ways:
- Gift Presentation: These cookies make fantastic gifts. Pack them in a cute box or jar tied with a red ribbon for a fun and thoughtful gift for Valentine’s Day.
- Party Treats: Serve these cookies at a Disney-themed Valentine’s Day party or bake them as a fun activity for kids during a family gathering.
- With Hot Chocolate: These cookies are delightful with a cup of hot chocolate or coffee, perfect for a cozy Valentine’s Day evening.
- Cookie Decorating Party: Set up a cookie decorating station at a party with different colored icings, sprinkles, and toppings for guests to create their own Mickey and Minnie-themed cookies.
Additional Tips for Mickey and Minnie Valentine’s Cookies
Here are some tips to make your Mickey and Minnie Valentine’s Cookies even more special:
- Chill the Dough: Don’t skip chilling the dough. It helps prevent the cookies from spreading too much and maintains their shape during baking.
- Use Piping Tips: Use fine piping tips for more detailed designs, especially when decorating small features like Mickey and Minnie’s facial expressions.
- Allow Time for Drying: Make sure the royal icing is completely dry before stacking the cookies or wrapping them as gifts to prevent smudging.
- Customizable Designs: If you’re feeling creative, you can add additional decorations like edible glitter, candy hearts, or sprinkles to enhance the look of your cookies.
Recipe Variations of Mickey and Minnie Valentine’s Cookies
Here are 5 variations of Mickey and Minnie Valentine’s Cookies you can try:
- Chocolate Mickey and Minnie Cookies: Add cocoa powder to the cookie dough to make a rich chocolate version of the cookies.
- Gluten-Free Mickey and Minnie Cookies: Use a gluten-free flour blend in place of regular flour to create a gluten-free version of these cookies.
- Vegan Mickey and Minnie Cookies: Substitute the butter with vegan butter and use a flax egg (1 tablespoon of flaxseed meal mixed with 2.5 tablespoons of water) to make these cookies vegan-friendly.
- Minnie Mouse Pink Sugar Cookies: Instead of royal icing, decorate the cookies with pink and red sugar crystals to create a sweet, sparkly Minnie look.
- Mickey Mouse Cookie Pops: Attach sticks to the cookies before baking and decorate them as cookie pops for a fun twist.
Freezing and Storage for Mickey and Minnie Valentine’s Cookies
- Freezing: You can freeze both the unbaked cookie dough and baked cookies. To freeze the dough, wrap it tightly in plastic wrap and store it in an airtight container for up to 3 months. To freeze baked cookies, place them in an airtight container with parchment paper between layers and freeze for up to 2 months. Thaw before decorating or serving.
- Storage: Store the decorated cookies in an airtight container at room temperature for up to 1 week. For the best freshness, eat them within the first few days.
Special Equipment for Mickey and Minnie Valentine’s Cookies
Here are some special equipment items you might need:
- Heart and Round Cookie Cutters: These are essential for cutting out Mickey and Minnie cookie shapes.
- Piping Bags and Tips: Use piping bags with small round tips to create detailed outlines and intricate designs with royal icing.
- Silicone Baking Mats: These prevent sticking and make cleanup easier when baking the cookies.
- Sifter: Sift the powdered sugar for smooth and lump-free royal icing.
- Cooling Rack: A cooling rack ensures that the cookies cool evenly and quickly.
FAQ Section about Mickey and Minnie Valentine’s Cookies
- Can I make these cookies without royal icing? Yes, you can use store-bought icing or simply sprinkle colored sugar over the cookies before baking for a simpler decoration.
- Can I make these cookies in advance? Absolutely! These cookies can be made several days ahead of time. Just store them in an airtight container until you’re ready to serve.
- How long does it take for the royal icing to dry? Royal icing typically takes about 6-8 hours to dry completely, depending on the humidity and thickness of the icing.
- Can I use fondant for decorating instead of royal icing? Yes, fondant is a great alternative for decorating. You can roll it out and cut out shapes for Mickey and Minnie’s faces and other features.
- Can I use a different flavor for the cookies? Yes! You can add cocoa powder for a chocolate-flavored dough or a bit of lemon zest for a citrus twist.
Mickey and Minnie Valentine’s Cookies
- Total Time: 2hours
Ingredients
For the Cookie Dough:
- 2 ¾ cups all-purpose flour
- 1 teaspoon baking powder
- ¼ teaspoon salt
- 1 cup (2 sticks) unsalted butter, softened
- 1 cup granulated sugar
- 1 large egg
- 1 teaspoon vanilla extract
- 1 teaspoon almond extract (optional for extra flavor)
- 2 tablespoons milk (or dairy-free alternative)
For the Royal Icing:
- 2 egg whites (or use powdered egg whites for a halal version)
- 2 ½ cups powdered sugar, sifted
- 1 teaspoon lemon juice or water (to adjust consistency)
- Gel food coloring (red, black, white, and pink for Mickey and Minnie designs)
- A pinch of cream of tartar (optional, for stiffening)
Ingredient Highlights
- Butter: The softened butter creates a rich, smooth dough that helps the cookies bake to a perfect consistency—soft and slightly chewy.
- Sugar: Granulated sugar sweetens the dough and gives the cookies a delicate crisp on the edges.
- Vanilla and Almond Extract: These extracts enhance the flavor of the cookies and give them a delightful aroma.
- Royal Icing: Royal icing is the perfect medium for decorating sugar cookies. It hardens beautifully, allowing for intricate designs like Mickey and Minnie’s faces and heart shapes.
- Gel Food Coloring: For decorating, gel food coloring is ideal because it creates vibrant, long-lasting colors without watering down the icing.
Instructions
Prepare the Cookie Dough:
- Preheat the Oven: Preheat your oven to 350°F (175°C). Line two baking sheets with parchment paper or silicone baking mats to prevent the cookies from sticking.
- Mix the Dry Ingredients: In a medium bowl, whisk together the flour, baking powder, and salt. Set aside.
- Cream the Butter and Sugar: In a large mixing bowl, beat the softened butter and granulated sugar together until light and fluffy (about 2-3 minutes).
- Add Wet Ingredients: Beat in the egg, vanilla extract, and almond extract (if using). Mix until fully combined.
- Combine Wet and Dry Ingredients: Gradually add the dry ingredients to the butter mixture, mixing on low speed. Add the milk and continue mixing until a soft dough forms. The dough should come together and not be too sticky.
- Chill the Dough: Divide the dough in half, flatten it into discs, wrap each in plastic wrap, and refrigerate for at least 30 minutes. Chilling the dough helps prevent the cookies from spreading too much while baking.
Roll Out and Cut the Cookies:
- Roll Out the Dough: Once chilled, remove the dough from the fridge and roll it out on a lightly floured surface to about ¼-inch thickness.
- Cut the Cookies: Use a heart-shaped or round cookie cutter to cut out the cookies. If you want to create Mickey and Minnie shapes, use a heart cutter for the body and two round cutters for the ears. Place the cookies on the prepared baking sheets.
- Bake the Cookies: Bake the cookies in the preheated oven for 10-12 minutes or until the edges are lightly golden. Keep a close eye on them to avoid overbaking.
- Cool: Allow the cookies to cool on the baking sheets for 5 minutes before transferring them to a wire rack to cool completely.
Decorate the Cookies:
- Prepare the Royal Icing: In a large bowl, beat the egg whites (or powdered egg whites and water) with a hand mixer until frothy. Gradually add the powdered sugar, continuing to beat until stiff peaks form. Add lemon juice or water to adjust the consistency to your liking. Divide the icing into several bowls and color each portion with gel food coloring (red, black, white, and pink for Minnie and Mickey designs).
- Pipe the Icing: Once the cookies have cooled, use a piping bag fitted with small tips to outline and flood the cookies with royal icing. Start with the white icing to create the base for Mickey and Minnie’s faces, and then use black for their ears, red for Minnie’s bow, and pink for accents. Allow the cookies to dry completely before serving or packaging them.
- Prep Time: 30minutes
Nutrition
- Serving Size: 16
- Calories: 200
- Fat: 8g
- Carbohydrates: 25g
- Protein: 2g
Conclusion
Mickey and Minnie Valentine’s Cookies are a delightful way to celebrate love, Disney, and the magic of Valentine’s Day. With their adorable designs, soft texture, and delicious flavor, these cookies are sure to bring smiles to anyone who receives them. Whether you’re baking for a special occasion, a party, or just because, this recipe is guaranteed to add a little extra joy to your day. Happy baking!